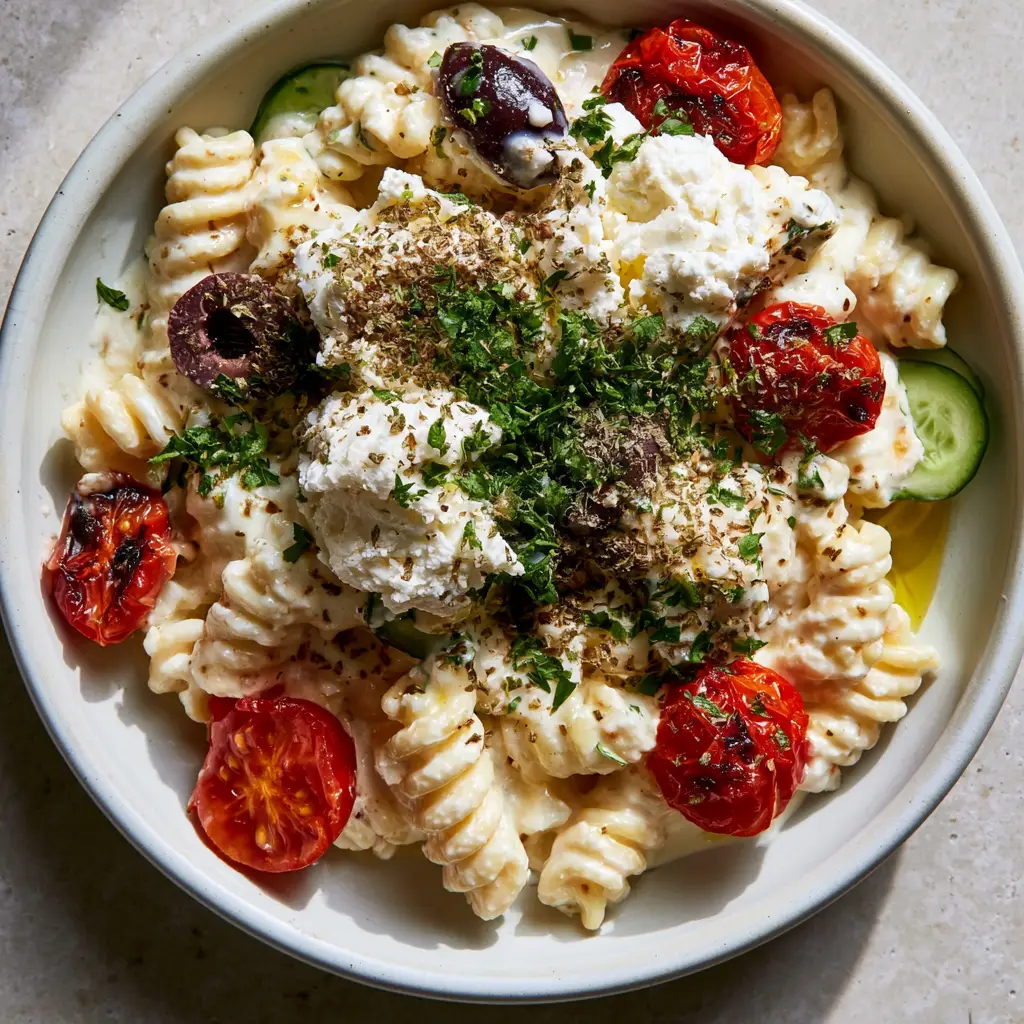
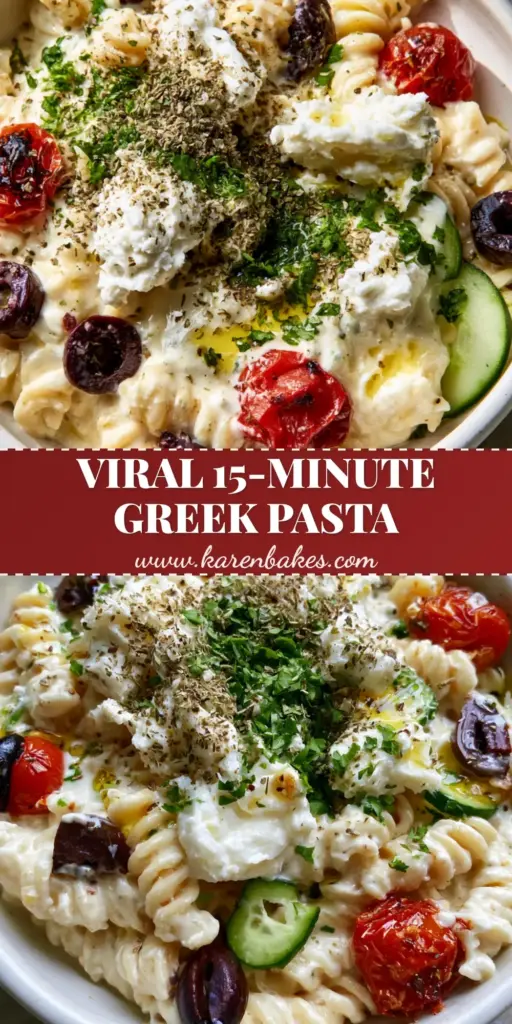
There is a specific kind of culinary magic that happens when salty, tangy feta meets the residual heat of al dente pasta. This Greek Pasta isn’t just another noodle dish; it is a sensory journey through the Mediterranean, captured in a rustic ceramic bowl. Imagine thick spirals of fusilli perfectly coated in a creamy, off-white sauce that clings to every curve, punctuated by the burst of sweet, charred cherry tomatoes.
This recipe was born from the desire to recreate that high-quality, handheld smartphone photo aesthetic—where the light hits the golden olive oil just right and the vibrant greens of fresh parsley and crisp cucumbers pop against a neutral stone background. Whether you are looking for a sophisticated weeknight dinner or a show-stopping meal for guests, this dish delivers on every visual and flavorful promise.
The secret lies in the contrast of temperatures and textures. We take the richness of marinated feta and transform it into a pourable velvet, then top it with cold, crisp Persian cucumbers and briny Kalamata olives. It is a masterclass in balance, designed for home cooks who appreciate the finer details of food styling and professional flavor layering.
Why This Creamy Mediterranean Fusion Works
- The Emulsion Factor: Unlike traditional pasta salads, this Greek Pasta uses a warm, melted marinated feta base that creates a professional-grade coating on the fusilli.
- Textural Harmony: You get the “snap” of fresh cucumber half-moons, the “squish” of blistered tomatoes, and the “crumbly” finish of raw feta chunks.
- Vibrant Visuals: With deep purple olives, bright red tomatoes, and vibrant green herbs, this dish is a visual masterpiece that looks exactly like a high-end food blog feature.
- Marinated Depth: Using marinated feta instead of plain blocks introduces herb-infused oils and aromatics directly into the sauce structure.
The Essential Components for a Perfect Bowl
To achieve the exact result seen in our visual blueprint, you need specific ingredients that offer both structural integrity and authentic flavor. Don’t skip the “invisible” ingredients like pasta water—it’s the glue that holds your Greek Pasta together.
1 lb (450g) Fusilli Pasta: The spiral shape is non-negotiable here. The corkscrew ridges are scientifically designed to trap the thick feta sauce, ensuring no bite is left dry.
8 oz (225g) Marinated Feta Cheese: Look for feta stored in oil with herbs. This will be melted down to form our “velvety” base, providing a much deeper flavor profile than dry-packed feta.
2 cups (300g) Cherry Tomatoes: These will be blistered in a hot skillet until their skins crack and caramelize, releasing sweet juices that mix with the salty cheese.
1/2 cup (75g) Kalamata Olives: These dark purple beauties provide the essential briny “funk” that defines Mediterranean cuisine. Ensure they are pitted and sliced into rings.
2 Small Persian Cucumbers: These are preferred over English cucumbers for their thinner skin and higher “crunch” factor. Slicing them into half-moons provides a fresh, cooling contrast.
4 oz (115g) Crumbled Feta (Extra): While some feta is melted into the sauce, these raw chunks added at the end provide the visual and textural “soft crumbles” mentioned in our blueprint.
2 tbsp (30ml) Extra Virgin Olive Oil: Use a high-quality, cold-pressed oil for the final drizzle. It should be golden and fragrant to catch the natural light on your plate.
Fresh Parsley and Dried Oregano: The oregano provides an earthy, floral backbone, while the finely chopped parsley adds that “vibrant green” finish that makes the dish look fresh and professional.
2 cloves Garlic (Foundational): Minced finely, this will be sautéed with the tomatoes to infuse the oil with a savory base note that rounds out the tang of the cheese.
Tools for Achieving the Artisan Look
To recreate the “overhead close-up” aesthetic of our Greek Pasta, you need the right gear. A heavy-bottomed stainless steel skillet or cast iron pan is essential for getting those “slightly charred” marks on your cherry tomatoes without turning them into mush.
You will also need a sturdy whisk to emulsify the feta and pasta water. A shallow white ceramic bowl is the ideal vessel for serving; the white background makes the red tomatoes and green cucumbers “pop,” just like in the professional photography prompt. Lastly, a sharp chef’s knife is required to get those perfectly uniform cucumber half-moons and finely chopped parsley.
Mastering the Art of the Feta Emulsion
Step 1: Achieving the Perfect Al Dente Fusilli
Bring a large pot of salted water to a rolling boil. Add your fusilli and cook for exactly 1 minute less than the package directions. We want the pasta “al dente” (to the tooth) because it will continue to cook slightly when tossed with the warm sauce. Crucial Step: Before draining, reserve 1 cup (240ml) of the starchy pasta water. This liquid gold is the secret to turning melted cheese into a velvety sauce.
Step 2: Blistering the Cherry Tomatoes
Heat 1 tablespoon (15ml) of the oil from the marinated feta jar in a large skillet over medium-high heat. Add the whole cherry tomatoes. Leave them undisturbed for 2-3 minutes until you hear them popping and see the skins charring. Add the minced garlic and a pinch of salt. Toss gently for another minute until the tomatoes are soft but still holding their shape. Remove the tomatoes from the pan and set aside so they don’t overcook.
Step 3: Creating the Thick, Velvety Sauce
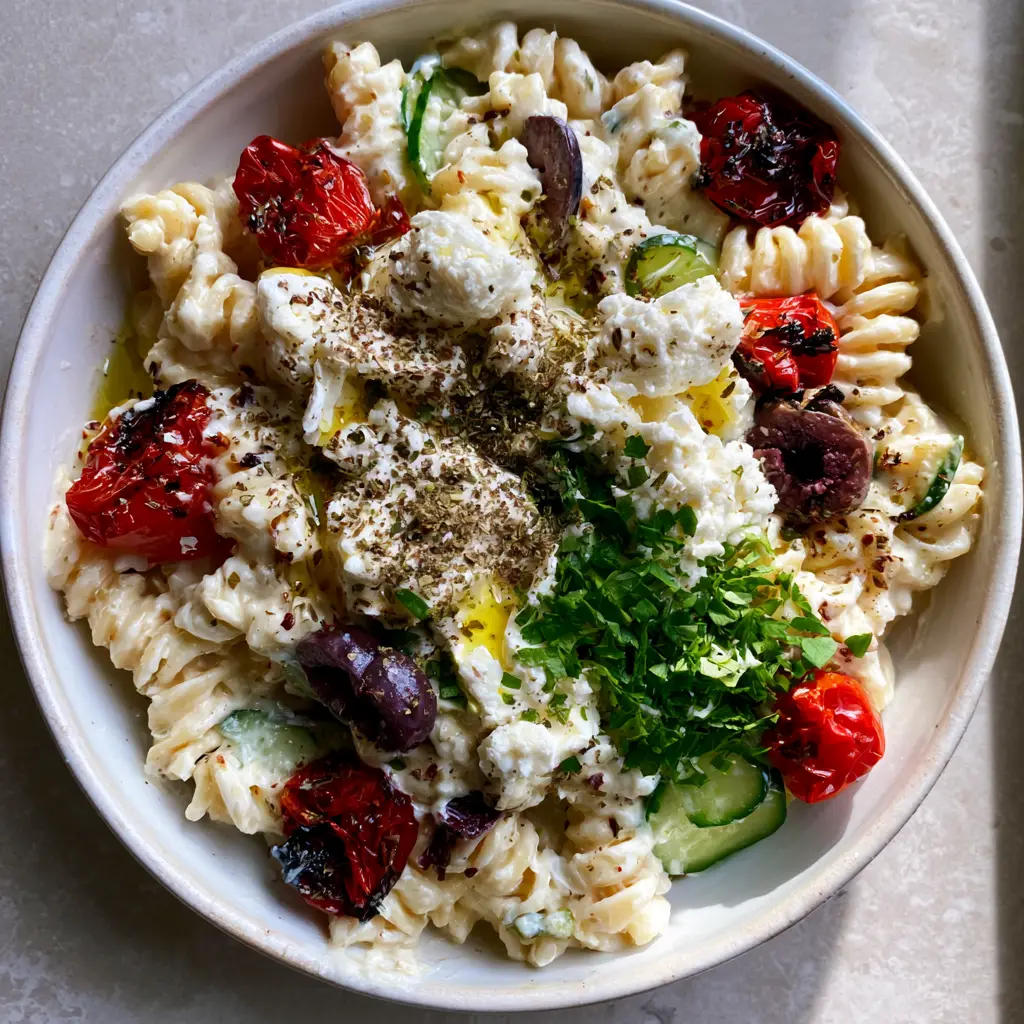
In the same skillet (now off the heat but still warm), add the 8 oz (225g) of marinated feta along with 1/4 cup (60ml) of the reserved pasta water. Use a whisk to mash the feta into the water. The heat will soften the cheese, and the starch in the water will help it emulsify. Keep whisking, adding more pasta water a tablespoon at a time, until you have a “thick, velvety, off-white sauce” that looks like liquid silk. Stir in the dried oregano at this stage to wake up the oils in the herbs.
Step 4: The Final Assembly and Styling
Add the cooked fusilli to the skillet with the feta sauce. Toss vigorously until every spiral is thoroughly coated. If the sauce is too thick, add one more splash of pasta water. Gently fold in the blistered tomatoes and sliced Kalamata olives. Transfer the mixture to your shallow white ceramic bowl.
Step 5: The “Pro-Chef” Garnishing
Top the warm pasta with the fresh cucumber half-moons. The residual heat will barely soften them, keeping them “crisp.” Scatter the large, soft crumbles of raw feta over the top. Heavy-sprinkle with the dried oregano and the finely chopped fresh parsley. Finally, perform the “golden drizzle” of extra virgin olive oil across the center of the dish.
Expert Tips for a Food-Blog Finish
- The Water Temperature: Ensure your pasta water is hot when you add it to the feta. Cold water will cause the cheese fats to seize rather than melt into a creamy sauce.
- Cucumber Timing: Never cook the cucumbers. They must be added at the very last second to maintain that “vibrant green” look and refreshing snap.
- Feta Quality: Use Sheep’s milk feta if possible; it has a lower melting point and a creamier texture than cow’s milk feta, which can sometimes be “gritty.”
- Tomato Control: If your tomatoes are very large, halve them before blistering. This releases more juice into the Greek Pasta, creating a natural “sauce within a sauce.”
Perfect Pairings for Your Greek Feast
While this dish is a complete meal on its own, it pairs beautifully with other Mediterranean-inspired sides. If you are hosting a larger gathering, consider serving this alongside a vibrant caprese salad or even a classic caesar twist for a variety of textures.
For those who love a bit of variety in their weekly meal prep, this flavor profile is a cousin to our pesto tortellini or even the bolder sun-dried tomato version. If you have kids at the table, you might find that this creamy sauce is a great bridge toward the kid-friendly pasta salads they already love.
Preserving Your Masterpiece: Storage and Reheating
This Greek Pasta is best enjoyed immediately while the sauce is at its creamiest. However, if you have leftovers, they can be stored in an airtight container in the refrigerator for up to 3 days.
Pro Tip for Reheating: The feta sauce will firm up in the fridge. To bring back that “velvety” texture, reheat the pasta in a skillet with a splash of water or milk, stirring constantly over low heat. Add fresh cucumbers and parsley only *after* reheating to preserve their color and crunch.
Frequently Asked Questions
Absolutely! Sliced grilled chicken or sautéed shrimp pair perfectly with the tangy feta and tomato base.
Yes, but you will need to add extra olive oil and dried herbs (like thyme and rosemary) to the pan to mimic the flavor depth provided by the marinade.
Whisk the feta with hot pasta water off the heat. Excessive direct boiling can cause the proteins in the feta to tighten and become gritty.
This specific recipe is best served warm to maintain the ‘melted’ texture of the feta sauce, though it is also delicious at room temperature.
Fusilli or Rotini are best because their spirals trap the thick sauce. Penne Rigate also works well due to its ridges.
The Ultimate Greek Pasta Recipe Card
Greek Pasta with Velvety Melted Feta and Blistered Tomatoes
Ingredients
Equipment
Method
- Cook fusilli in salted water until al dente. Reserve 1 cup (240ml) of pasta water before draining.
- In a skillet over medium-high heat, sear cherry tomatoes in feta oil until charred and bursting.
- Whisk marinated feta with reserved pasta water in the warm skillet until a thick, velvety sauce forms.
- Toss pasta in the sauce, then fold in tomatoes, olives, cucumbers, and extra feta crumbles.
- Drizzle with olive oil and sprinkle with fresh parsley and dried oregano.
Notes
Add cucumbers only at the very end to keep them crisp.
Closing & Call to Action
Bringing the flavors of the Mediterranean into your kitchen has never been easier or more visually rewarding. This Greek Pasta combines the rustic charm of charred tomatoes with the sophisticated creaminess of a melted feta emulsion. It’s a dish that proves you don’t need a professional kitchen to produce a professional-looking (and tasting) meal.
If you made this recipe and love the way it looks in your own shallow ceramic bowl, I want to see it! Tag me in your photos and be sure to follow katie_bites on Pinterest for more visual recipe inspiration. Don’t forget to leave a comment below with your favorite pasta shape for this sauce!