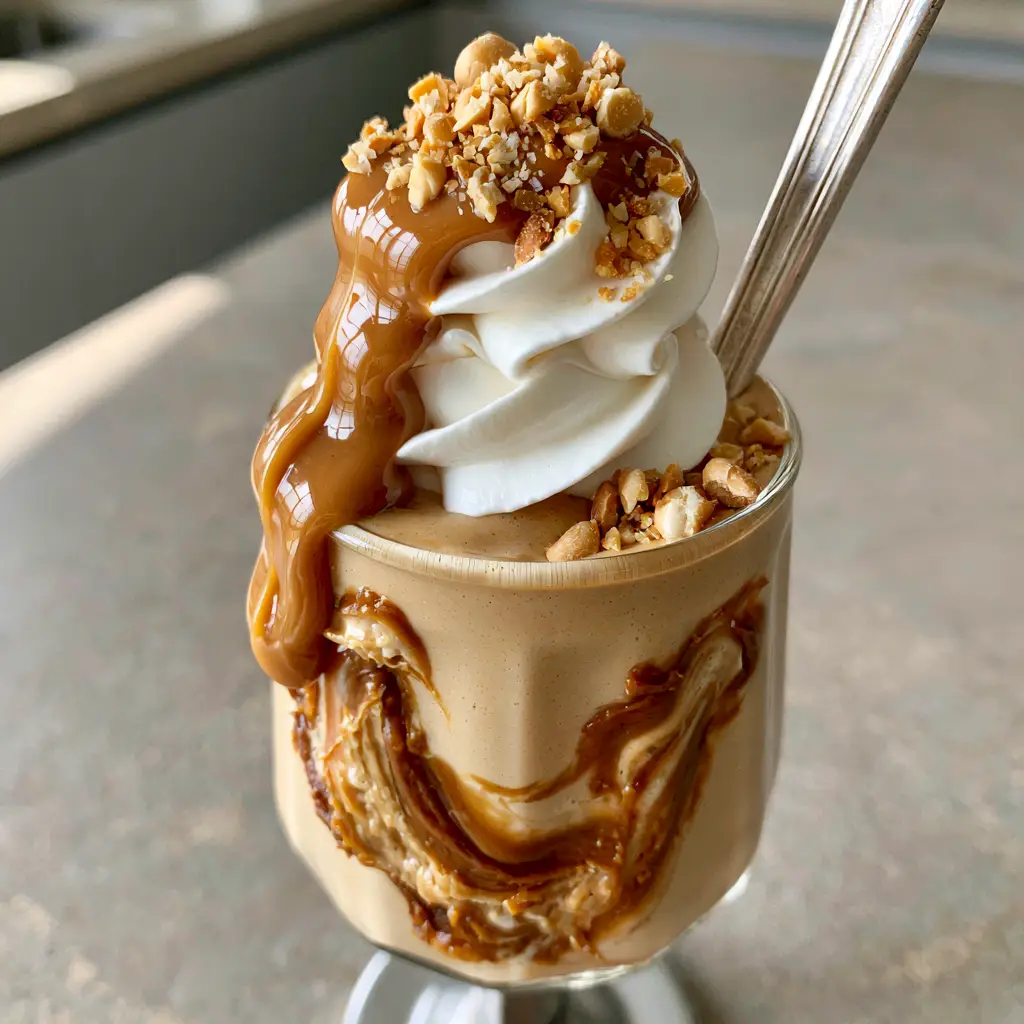
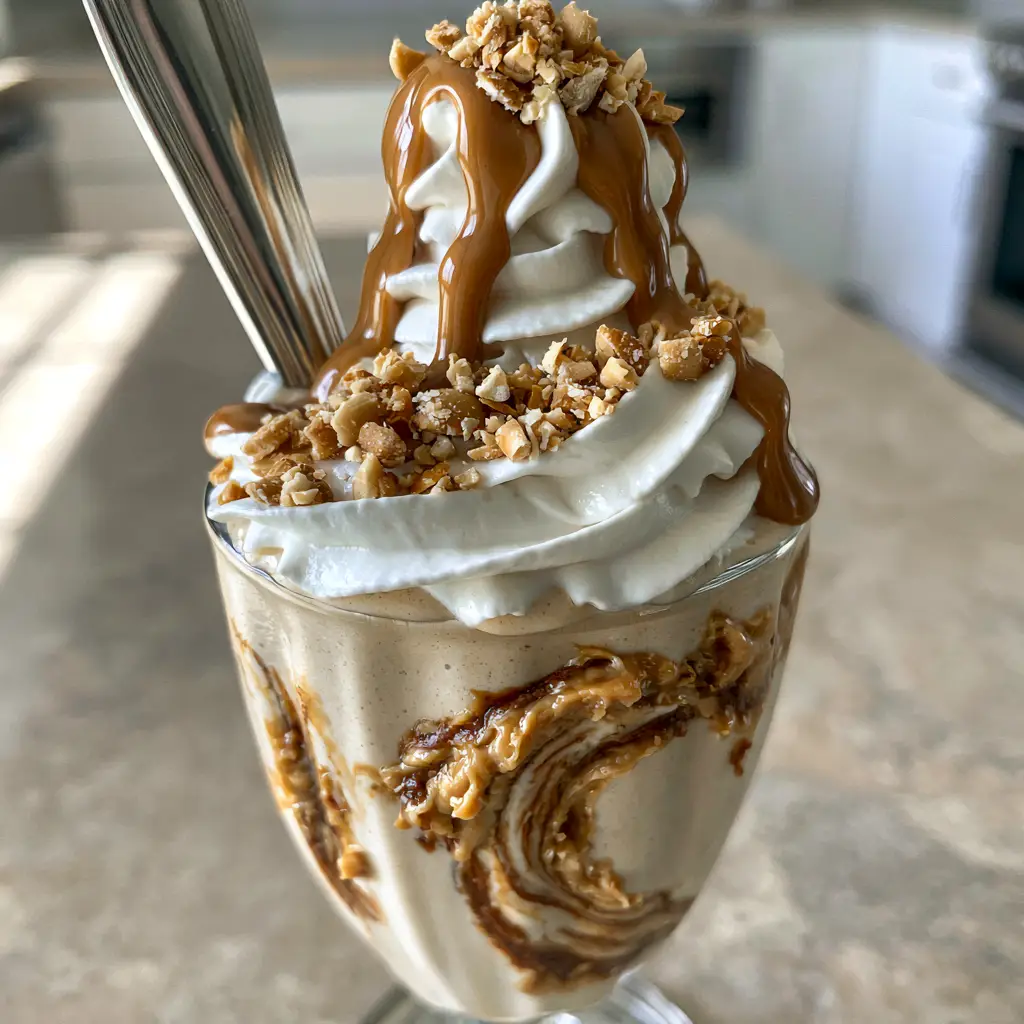
There is a specific, visceral joy in a Peanut Butter Milkshake that challenges the laws of physics. We aren’t talking about a runny, milky beverage sipped through a flimsy plastic straw. We are talking about a dense, matte, and velvety masterpiece so structurally sound that a heavy silver spoon can stand perfectly upright in the center without leaning a single degree. This recipe is a deep dive into the architecture of the perfect frozen treat, bridging the gap between a classic diner staple and a gourmet dessert experience.
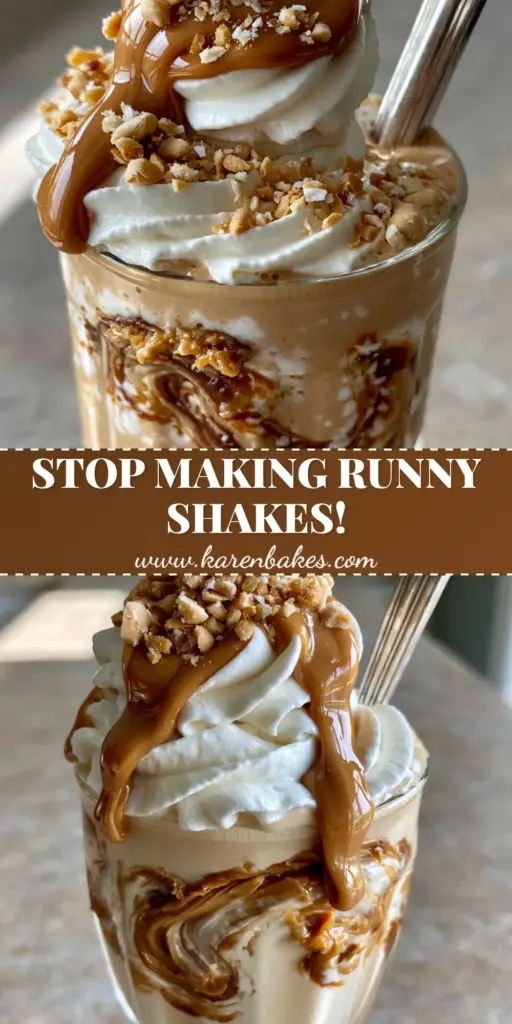
When you look at a truly elite Peanut Butter Milkshake, you should see visible ripples from the blending process, indicating a low-moisture, high-fat content that promises a rich mouthfeel. The visual appeal is heightened by dark, roasted peanut butter marbled against a frozen custard base, crowned with a mountain of stable, stiff-peak whipped cream. In this guide, I will show you exactly how to achieve that handheld smartphone photo aesthetic—soft daylight, shallow depth of field, and a shake that looks as good as it tastes.
Why This Extra-Thick Peanut Butter Shake Defies Gravity
- The “Vertical Spoon” Standard: This recipe utilizes a specific ratio of frozen custard to liquid, ensuring the milkshake has the structural integrity to hold a heavy silver spoon vertically.
- Multi-Dimensional Peanut Texture: We don’t just use one type of peanut; we incorporate a frozen custard base, roasted swirls, and a glossy drizzle to hit every sensory note.
- Matte Velvety Finish: By controlling the “overrun” (the amount of air whipped in), we achieve a dense, professional texture that looks incredible under natural light.
- The Salt-Sugar Balance: The inclusion of crushed salted peanuts and high-quality sea salt ensures the shake is deeply flavorful rather than just cloyingly sweet.
The Anatomy of an Elite Peanut Butter Custard Base
Premium Vanilla Bean Frozen Custard: 3 cups (710ml). Using a custard base instead of standard ice cream provides a higher egg yolk content, which results in a smoother, denser texture that resists melting. This is the foundation of the Peanut Butter Milkshake.
Creamy Roasted Peanut Butter (for blending): 1/2 cup (125g). Select a brand that uses deeply roasted nuts to ensure the flavor isn’t lost when diluted with the cold cream; this provides the signature nutty backbone.
Whole Milk or Heavy Cream: 1/4 cup (60ml). Use just enough to allow the blender blades to turn; keeping the liquid at a minimum is the secret to that extreme thickness you see in professional food photography.
Dark Roasted Creamy Peanut Butter (for marbling): 1/4 cup (60g). This will be slightly warmed so it can be swirled through the glass, creating those beautiful, distinct ripples against the pale custard.
Heavy Whipping Cream: 1/2 cup (120ml). Whipped to stiff peaks, this creates the “crown” that supports the weight of the drizzle and crushed nuts without collapsing into the shake.
High-Gloss Peanut Butter Drizzle: 2 tbsp (30g). A mixture of peanut butter and a touch of honey or maple syrup creates a glossy, slow-moving “lava” effect that catches the light perfectly.
Crushed Salted Roasted Peanuts: 2 tbsp (15g). These provide a necessary textural contrast (the “crunch”) and a salty pop that balances the rich fats of the custard.
Fine Sea Salt: 1 pinch. An “invisible” ingredient that acts as a flavor enhancer, sharpening the roasted notes of the peanuts.
Must-Have Tools for the Perfect Frozen Consistency
To achieve the results seen in our visual blueprint, a standard low-power blender may struggle. A high-speed professional blender is recommended to process the dense frozen custard without requiring excessive liquid. You will also need a long-handled vertical silver spoon, which serves as both a tool for consumption and a “tester” for the shake’s thickness.
For the aesthetic presentation, use a vintage fluted glass. The ridges in the glass catch the light and help hold the marbled peanut butter swirls in place along the sides. A small offset spatula or a butter knife is also helpful for creating the marbling effect manually before pouring the shake. Finally, a whisk or electric hand mixer is essential for achieving those stable, stiff whipped cream peaks.
The Master Class: Crafting Your Thickest Shake Ever
Preparing the Glass and Marbling
Begin by placing your vintage fluted glass in the freezer for at least 10 minutes. A chilled glass prevents the shake from melting on contact and helps the marbled swirls adhere to the sides. While the glass chills, take your 1/4 cup (60g) of dark roasted peanut butter and microwave it for 10-15 seconds until it is slightly fluid. Remove the glass from the freezer and, using a spoon, drizzle the peanut butter in a circular motion inside the glass, allowing it to trail down the sides in thick, organic ribbons.
Blending for Maximum Density
Combine the 3 cups (710ml) of frozen custard, 1/2 cup (125g) of creamy peanut butter, the pinch of sea salt, and the minimal 1/4 cup (60ml) of milk in your blender. Pulse the blender rather than running it on high constantly; this prevents the friction from the blades from heating the mixture too much. You are looking for a visual cue of “thick ripples” forming on the surface—once the mixture is uniform but still resisting the blades, stop immediately. The Peanut Butter Milkshake should be so thick you might need to use a spatula to help it out of the blender jar.
Building the Stiff Whipped Peaks
In a chilled bowl, whisk the heavy cream until it reaches stiff peaks. A sensory cue to look for is that the cream should hold its shape entirely when the whisk is lifted, forming a sharp point that does not droop. This stability is crucial because it must support the warm drizzle and the weight of the crushed peanuts. Do not over-whisk, or the cream will become grainy and turn toward butter.
The Final Assemblage and Drizzle
Pour (or spoon) the thick shake into your prepared marbled glass. Use a spoon to smooth the top. Pipe or dollop the stiff whipped cream in a tall, stable swirl. For the final touch, mix your drizzle ingredients until glossy and warm it slightly. Pour it over the cream in a slow-moving stream, letting it catch on the peaks. Sprinkle the crushed salted peanuts generously over the top and insert your heavy silver spoon vertically into the center. It should stand perfectly upright, a testament to your culinary precision.
Troubleshooting Your Texture: Pro Tips for Shake Success
- The Temperature Factor: If your custard is too hard, let it sit on the counter for 5 minutes before blending. Never add more milk than necessary, as this destroys the “vertical spoon” structural integrity of the Peanut Butter Milkshake.
- Achieving the Gloss: If your peanut butter drizzle looks matte or clumpy, whisk in a teaspoon of neutral oil (like grapeseed) or honey. This creates the “glossy” look required for professional-grade food photography.
- Preventing Marbling Meltdown: If your marbled swirls are disappearing into the shake, it means your shake mixture is too thin or your peanut butter was too hot. Ensure the glass is icy cold to “freeze” the swirls in place.
- Salt is Key: If the shake tastes “flat,” add another tiny pinch of salt. Salt unlocks the aromatic compounds in the roasted peanuts that sugar alone cannot.
Keeping it Frosty: Storage and Make-Ahead Secrets
Milkshakes are best enjoyed immediately, especially when aiming for that specific velvety texture. However, if you are preparing for a party, you can pre-marble your glasses and store them in the freezer for up to 24 hours. You can also whip the cream in advance and store it in an airtight container in the fridge for up to 4 hours.
If you have leftover Peanut Butter Milkshake, do not try to keep it in the fridge; it will turn into a thin soup. Instead, pour the leftovers into a freezer-safe container. When you’re ready for more, let it thaw on the counter for 10 minutes and give it a quick re-blend to restore the aeration and creaminess. It won’t be quite as perfect as the fresh version, but it will still be a delicious frozen treat.
The Ultimate Pairings: What to Eat With Your Shake
While a Peanut Butter Milkshake is a meal in itself, it pairs beautifully with salty or savory snacks. For a classic diner experience, serve this alongside crispy seasoned fries to dip into the shake—the salt and cold cream combo is legendary. If you’re looking for something a bit lighter to balance the richness, a vibrant fresh green salad can provide a necessary palate cleanser.
For those hosting a dessert party, consider serving smaller portions of this shake alongside other handheld treats. It goes surprisingly well with sweet dessert dips and graham crackers. If you want to lean into the nostalgic theme, a tray of warm rolls or a savory club-style pasta salad can turn this indulgence into a full, satisfying meal.
Burning Questions: The Peanut Butter Shake FAQ
Yes, but be aware that natural peanut butter can sometimes result in a grainier texture. For the smoothest, most velvety Peanut Butter Milkshake, a high-quality commercially creamy roasted peanut butter is recommended.
Chill your glass in the freezer for at least 10 minutes before drizzling the peanut butter inside. The cold surface ‘sets’ the peanut butter, preventing it from immediately sliding to the bottom.
Absolutely. Frozen custard contains egg yolks, which provide a richer fat content and a denser structure, making it the perfect foundation for an ultra-thick Peanut Butter Milkshake.
The secret is using frozen custard instead of ice cream and keeping the liquid (milk) to an absolute minimum. Using a high-speed blender allows you to process the dense mixture without needing to thin it out.
If your spoon leans, the shake is too thin. This usually happens if the ice cream has melted too much during blending or if too much milk was added. Try using more frozen custard and pulsing the blender to keep it cold.
The Ultimate Peanut Butter Milkshake Recipe
Peanut Butter Milkshake: How to Craft the Ultimate Ultra-Thick Marbled Custard Shake
Ingredients
Equipment
Method
- Place a vintage fluted glass in the freezer for 10 minutes. Warm the dark roasted peanut butter and drizzle it inside the chilled glass to create marbled swirls.
- In a separate bowl, whisk heavy cream until it reaches stiff peaks that hold their shape perfectly.
- Combine frozen custard, peanut butter, salt, and milk in a high-speed blender. Pulse until thick ripples form but the mixture remains very dense.
- Transfer the shake to the marbled glass. Top with a tall swirl of whipped cream, the glossy drizzle, and crushed peanuts.
- Insert a silver spoon vertically into the center; it should stand upright without support.
Notes
Use a professional blender for the best matte texture.
Closing & Call to Action
Crafting the perfect Peanut Butter Milkshake is an exercise in patience and precision, but the result—a thick, marbled, and decadent masterpiece—is well worth the effort. The combination of the frozen custard base and the dark roasted swirls creates a flavor profile that is sophisticated yet nostalgic. Whether you are making this for a special occasion or just to test your blender’s limits, it is a recipe that never fails to impress.
If you enjoyed this deep dive into frozen dessert architecture, please leave a comment below and let me know how your “vertical spoon test” went! Don’t forget to share your creations on Pinterest and tag me. For more indulgent recipes and culinary tips, sign up for our newsletter to get the latest updates delivered straight to your inbox.